Showing posts with label dessert. Show all posts

Friday, June 11, 2010

Chocolate Cobbler

I may start exclusively cooking from the Pioneer Woman's website. And her spin-off, Tasty Kitchen... um yeah, tasty in my kitchen (thanks to all the wonderful cooks and contributors)!

Yee-haw cow-pokes. Starve yourself for a week, if you must. Ride a few broncos, or bucks, or steers (whatever they do on the range), or if you're a city slicker, hit the gym. You want these calories. Your body neeeeeeds these calories. After I ate my serving and our guest left, I was eating spoonfuls out of the pan. Shameless pregnant woman on the loose, with chocolate cobbler. Beware.

I can't tell you how sad I was to realize I missed the Pioneer Woman's book signing in Seattle! But chocolate cobbler made me feel better. A little bit. I'm still bummed.

Yeah, yeah, I hear you... there's IS a recipe coming. And guess what, it's the EASIEST, happiest, most delicious, crowd pleasingest dessert recipe I will ever give you. By far. Hands down. I love this recipe. I love this dessert. Yum.

(sorry, couldn't get a very good shot - but look at the chocolate cakey part mixed with some gooey!)

Thank you, Pioneer Woman. For making it all possible.

Chocolate Cobbler
submitted by S.H. on Tasty Kitchen

1 cup All-purpose Flour
2 teaspoons Baking Powder
¼ teaspoons Salt
7 Tablespoons Cocoa Powder, Divided
1-¼ cup Sugar, Divided
½ cups Milk
⅓ cups Melted Butter
1-½ teaspoon Vanilla Extract
½ cups Light Brown Sugar, Packed
1-½ cup Hot Tap Water

Preparation Instructions

Preheat oven to 350 degrees.

First stir together the flour, baking powder, salt, 3 tablespoons of the cocoa, and 3/4 cup of the white sugar. Reserve the remaining cocoa and sugar.

Stir in the milk, melted butter, and vanilla to the flour mixture. Mix until smooth.

Pour the mixture into an ungreased 8-inch baking dish.

In a separate small bowl, mix the remaining white sugar (it should be 1/2 cup), the brown sugar, and remaining 4 tablespoons of cocoa. Sprinkle this mixture evenly over the batter.

Pour the hot tap water over all. DO NOT STIR!

Bake for about 40 minutes or until the center is set.

Let stand for a few minutes. Serve with vanilla ice cream.

Guten appetit!

Friday, April 2, 2010

Lemon Cake

Happy Easter weekend! It's hard not to love this time of year... tulips and other bright flowers, hints of warm sunny days ahead, and cooking light fresh dishes again.

I'm sharing a mother-in-law recipe today because it seems like a good start to spring. It's a moist, spongy (is that a word?) and zesty (this should be a word, if it isn't!) cake. Kind of retro too, calls for jello. Anytime I use jello, I think of my parents generation. It was like crack for the suburban housewife... 'what?! I can mix water with this packet, refrigerate and give my kids a treat they will eat?!'. However, what was with all those jello molds that included cottage cheese?? Gross. This is NOTHING like that though, nothing. Forget I said that.

This past visit, my MIL made this cake for her special 70th birthday. I think we ate this cake for an entire week (there were only 4 of us, and it makes a fairly large cake). It was good. Remember: moist, spongy, and zesty. Yum.

With a scoop of vanilla ice cream, I was in heaven!

This was a secret lunch portion I snuck on the side, so no ice cream. Shhh.

If you're looking for a spring weekend treat, or maybe you have a special birthday coming up for someone that doesn't like icing cakes, I recommend giving this one a go.

p.s. I'm making Pesto, Pasta and Peas again tonight - sooooo good! Want to come over?

Lemon Cake Squares
from my Mother-in-law

1 package Duncan Hines yellow cake mix
1 package lemon jello
3/4 cup cooking oil
4 eggs
1 cup water
2 lemons - juiced and rind grated
2 cups confectioners sugar (powdered sugar)

Preheat oven to 350 degrees.

Empty cake mix into a large bowl and make a hole (think volcano crater) in the center. Add the next 4 ingredients (through water) and mix.

Bake in an 8x10 or 9x12 size pan - you want to be able to cut the cake into squares.

Make a glaze by stirring the lemon juice, rind and powdered sugar together. Spread on cake as soon as it's taken out of the oven.

At this point, you can freeze the cake (reheat in the oven) or cool to room temperature and serve.

Guten appetit!

Friday, February 26, 2010

Sugar Cookies

Sugar cookies... don't they sound delicious? Kind of simple, but you get an occasional craving for one. Then you eat one and think, "hmm, that wasn't anything fantastic". But by the time you're done with the first one, you've already started to reach for a second, because hey, why eat just one cookie? And, they're actually quite good. As you are close to finishing off your second cookie, you realize it's actually your fourth and you absentmindedly kept reaching for another, unable to stop yourself from eating more, more, more!

They should rename these 'sugar crack'. The addiction sneaks up on you and then you're hooked until they are all gone.

Thank goodness these were for the Chef's Helper's birthday party and I had a worthy cause to champion my hand away from the cookies.

Here's one bundled up to take home. I forgot to snap a pre-bagging picture - it was a busy day!

Even without frosting, these are quite tasty. In the future, I'll even feel pretty good about feeding them to the Chef's Helper and his friends (occasionally). They have sugar of course, but they don't taste overly sweet... Until you get to the frosting - there's no way to get around that one. But how fun is it to decorate cookies with little kids?! You can't leave out the frosting. I can't wait.

If you're looking for a sugar cookie, this is definitely a quality recipe. Try them plain with sprinkles too!

Sugar Cookies
from Dine & Dish

¾ cup butter or margarine, softened
1 cup sugar
2 eggs
1 teaspoon vanilla
2 ¾ cup flour
1 teaspoon baking powder
½ teaspoon salt
Icing (recipe follows)

In a mixing bowl, cream butter & sugar. Add eggs and vanilla; beat until light and fluffy. Combine flour, baking powder and salt. Gradually add to creamed mixture and mix well. Chill for 1 hour or until firm.

Preheat oven to 375.

On a generously floured surface, roll a 1/3 of dough to ¼ inch thickness. Cut with cookie cutter. Place on lightly greased baking sheets. Bake for 8-10 minutes. Cool on wire racks.

Laura's notes: Work quickly! Once the dough warms up, it's a mess trying to maintain your shape while you transfer to the cookie sheet. If you're only using one cookie sheet at a time, I also recommend you keep the remaining dough in the refrigerator until you are ready to work with it.

Repeat with remaining dough. Frost.

Yield: 2 dozen large cookies.

Icing
from Allrecipes

Because the icing associated with the above cookies needed to be refrigerated AND was soft (i.e. smoosh in the gift bags), I had to go with something a little sturdier. This icing was great with the coloring, dried FAST and glossy, and there was no sticky-smooshing to the bag. Perfect.

1 cup confectioners sugar (powdered sugar)
2 teaspoons milk
2 teaspoons light corn syrup
1/4 teaspoon almond extract
assorted food coloring

In a small bowl, mix together all wet ingredients. Add powdered sugar incrementally while stirring. Only add enough sugar to get the consistency you are looking for. It should be smooth and glossy.

Divide into separate bowls, and add food colorings to each to desired intensity. Dip cookies, or paint them with a brush (I used one of my food basting brushes - I wasn't going for detail).

Guten appetit!

Friday, February 19, 2010

Millie's White Wedding Cake

I wish I knew Millie, and I wish I'd taken her baking class with Kristen (from Dine & Dish) where Kristen learned how to make Millie's White Wedding Cake because if this is any example of Millie's baking skills, the woman had a lot to teach! It was light, sweet but not too sweet, and moist. Just as a cake should be. It's a great go-to white cake.

Our cup-cakes, pre-frosting

I felt like the Chefs Helper's 1st birthday party was a big success, and this cake helped add even more sweetness to the day. It's hard to believe he's a year old. On one hand, he's grown and changed so much and it feels like the year has flown by. On the other, it seems like he's always been with us. He is such a sweet, happy baby. We couldn't have asked for a better son or legacy.

His 'cake' was a cupcake design mimicking Eric Carle's Very Hungry Caterpillar book cover (not my idea! see below).

Our little man is a book lover, so it seemed like a fun and appropriate theme. Fingers crossed that his love for books continues. (He must get it from his daddy, since when his mama was younger, she refused to read books in lieu of watching TV - even when bribed with money! yikes)

The green color was MUCH darker than the photo looks

My final design couldn't hold a candle to the original, but no one but me knew that. I couldn't find the right candy for the eyes, and ran out of time, so our caterpillar had no eyes. He was meant to be eaten, not see the world, so I was OK with it.

I thought this was really fun to create AND easy! I simply spread the cupcake icing with a knife and sort of swirled it around using two different green tones - bonus points for super easy. Came together in a snap. Here was my attack plan:

Day before the party: Bake cupcakes, then pre-measure anything I could for the icing and put all non-perishable ingredients on the counter next to the measuring cups/spoons I would need.

Day-of the party, which was at 3pm: Make icing, ice cupcakes, assemble on cake board with extra pieces (feet, eyes, etc). Done!

This was probably the most prepared I have ever been for a party. Kudos to my awesome husband for cleaning, running out for the balloons, and all the other things he does (party days and everyday).

Happy birthday, sweet sweet boy. We hope you enjoyed your party, and cake!

* Here's where the cake design came from.

Millie’s White Wedding Cake
from Dine & Dish

2 (18 ounce) boxes white cake mix (Betty Crocker or Pillsbury)
2 cups all purpose flour
2 cups granulated sugar
1 1/2 teaspoons salt
2 2/3 cups water
1/4 cup vegetable oil
2 teaspoons real vanilla
2 teaspoons almond extract
2 cups sour cream
8 large egg whites

Place all ingredients into a large mixing bowl and beat on medium speed for 3 minutes, until fully incorporated.

Pour into greased and floured cake pans or cupcake liners, filling each slightly over half full.

Lightly tap cake pans on counter to bring air bubbles to top.

Bake in preheated 325° F oven until cake tests done.

Baking time varies according to the size and depth of pans being used.

For cupcakes, Kristen says she bakes them approximately 18 minutes. Mine took between 28-30 minutes. I waited until the cupcakes started to turn light brown on top. My cakes were done in less time and I knew to check them when the sides started to turn brown. Test with a toothpick to know when yours are done.

Guten appetit!

Friday, December 18, 2009

Classic Apple Pie


Surprisingly, I've had a hard time thinking of a traditional dessert for Christmas. I'm not talking about gingerbread houses or sugar cookies. Those are fun to make pre-Christmas, to get in the holiday spirit. I'm referring to the dessert for Christmas dinner. And I'm certainly not about to attempt a Buche de Noel!

I don't know why this is, but oddly enough, we have relatively local Granny Smith apples in the market right now. And oohhhh, how I love an apple pie!

The last time I made an apple pie, Elise's recipe caught my eye because of the sherry and vanilla. I hadn't seen or used either before in an apple pie recipe. Sounded delicious and worth a shot.

Needless to say, once I had my second layer of crust on the pie, I realized I'd forgotten the step of adding the sherry and vanilla! Classic. That's what I get for trying to speed through a recipe.

As you may have guessed though, I've chosen Apple Pie as my Christmas dessert, and so I will have a re-do of this recipe. If it's half as good as the recipe was before, without the sherry and vanilla, it will be a huge hit! Truly, this is grandma's apple pie (with or without the sherry and vanilla) and not a crumb was left on anyone's plate. I can't wait to make it again.


I hope you have something equally scrumptious planned for your dinner festivities. If you still need a dessert, consider Elise's apple pie.

TIP: To prevent a raw bottom crust, bake pies for 20 minutes on the bottom rack, then switch to the center rack for the remaining time. (this trick works perfectly with this recipe, as Elise has you turn down the heat after 20 min)

See the holly leaves cut out of the pie crust? I loved this pie.

Old Fashioned Apple Pie
from Simply Recipes

Crust Ingredients
2 cups all-purpose flour, plus extra for rolling
1/2 cup finely ground blanched almonds or almond flour (can substitute 1/2 cup flour if you don't have almonds)
16 Tbsp (2 sticks) unsalted butter, cut into 1/2 inch cubes, chilled in freezer for at least 15 minutes
1 teaspoon salt
1 heaping teaspoon brown sugar
3 to 6 Tbsp water, very cold

Filling Ingredients

2/3 cup sugar
3 tablespoons all-purpose flour
1/4 teaspoon ground allspice
1/8 teaspoon nutmeg
1/2 teaspoon cinnamon
3 pounds of 1/4-1/2 inch thick slices of peeled and cored good cooking apples such as Granny Smith, Pippin, or Golden Delicious
1 1/2 tablespoons brandy
1 teaspoon vanilla extract

Egg Wash
1 large egg yolk
1 Tbsp cream


In a food processor, combine flour, almonds, salt and brown sugar, pulse to mix. Add butter and pulse 6 to 8 times, until mixture resembles coarse meal, with pea size pieces of butter. Add water 1 Tablespoon at a time, pulsing until mixture just begins to clump together. If you pinch some of the crumbly dough and it holds together, it's ready, if not, add a little more water and pulse again.

Remove dough from machine and place on a clean surface. Carefully shape into 2 discs. Do not over-knead the dough! You should still be able to see little bits of butter in the dough. These bits of butter are what will allow the result crust to be flaky. Wrap each disc in plastic wrap and refrigerate at least 1 hour.


Position rack in bottom third of oven and preheat to 375°F.

Combine sugar, flour and spices in large bowl. Use your hands and mix in the apples so they are well coated, then add brandy and vanilla extract.

Remove one crust disk from the refrigerator. Let sit at room temperature for 5-10 minutes. Sprinkle some flour on top of the disk. Roll out with a rolling pin on a lightly floured surface to a 12 inch circle; about 1/8 of an inch thick. As you roll out the dough, use a metal spatula to check if the dough is sticking to the surface below. Add a few sprinkles of flour if necessary to keep the dough from sticking. Gently fold in half. Place on to a 9-inch pie plate, lining up the fold with the center of the pan. Gently unfold and press down to line the pie dish with the dough.

Spoon in apple filling, mounding slightly in center.

Roll out second disk of dough, as before. Gently turn over onto the top of the apples in the pie. Pinch top and bottom of dough rounds firmly together. Trim excess dough with kitchen shears, leaving a 3/4 inch overhang. Fold dough under itself so that the edge of the fold is flush with the edge of the pan. Flute edges using thumb and forefinger or press with a fork.

Stir yolk and cream in small bowl to blend. Brush over top of pie. Cut slits in top crust to allow steam to escape. Bake pie until crust begins to turn golden, about 20 minutes, then reduce heat to 350°F. Tent the rims with aluminum foil or a pie protector if the edges are browning too quickly. Bake until crust is golden and juices are bubbling, anywhere from an additional 30 to 45 minutes, depending on the type of apples you are using. Transfer to rack; let stand 1 hour. Serve pie warm or at room temperature.

More apple desserts:
- Apple Tart, from Orangette
- Cranberry Apple Pie, from A Full Belly
- Apple Crisp, from Joy the Baker

Guten appetit!

Tuesday, December 1, 2009

Appalachian Trail Cookies

This recipe was written in the December 2008 Bicycling magazine, under the title "Super Foods Served Here". Good job marketing or editing or whoever makes up titles to articles. The words 'super' and 'food' together are being used (or overused?) like wildfire these days. But it works. That title would get my attention every time.

The article goes on to discuss a triathlete who's also a chef creating wonderful healthy foods for sports minded folks. It goes on and on, and at the end, they gave a recipe... for cookies! Um, now I'm really hooked on this article. I'm thinking 'healthy cookie'. Yes! Thank YOU mr. triathlete turned chef turned article writer.

And here we have them...

A healthy cookie. Mostly. A cookie is a cookie after all! But as cookies go, these are not only healthy, but super, super delicious.

They are a bit crumbly, but that may be because I cook the heck out of cookies, wanting them to be crunchy. And I'm willing to deal with the crumbly-ness, since it doesn't affect their tasty-ness.

For a take along snack on hikes, bike rides and car trips, these get two thumbs up from me!

* If feeding these to kids, beware: as you can see below, they do involve peanuts. But you can omit those and they would still be delicious.

Appalachian Trail Cookies
from Michael Pfab in Bicycling Magazine

1/4 cup shortening
1/4 cup unsalted butter
1/2 cup dark brown sugar
1/2 cup granulated sugar
1 large egg
1/2 cup shredded coconut (I love this!)
3/4 cup plus 1 tablespoon pastry flour (I used all purpose flour)
pinch salt
pinch baking soda
pinch ground cinnamon
2 cups old-fashioned oats
1/2 cup raisins (optional - I didn't use them)
1/3 cup roasted unsalted peanuts
1/3 cup M&M candies (plain)

Blend shortening, butter, brown sugar and sugar. Add egg and mix well.

Add coconut, flour, salt, baking soda and cinnamon. Mix only until blended.

Fold in oats by hand, then mix in raisins, peanuts and M&Ms.

Spoon out in equal portions on parchment-lined baking pan. Bake at 360 degrees for 10-12 minutes, or until golden brown. Makes two dozen.

Interested in the 'healthy' content of the cookies? 157 calories per serving, 7 grams of fat, 21 grams of carbs and 3 grams of protein. Sorry, they neglect to tell you how many cookies equals a serving.

Guten appetit!

Tuesday, November 17, 2009

Pumpkin Pie with Spiced Whipped Cream

Mama mia, this was good!

When it comes to Thanksgiving, I would like to eat candied yams, dinner rolls (preferably my mom's bran muffins, but homemade potato rolls are also delicious) and pumpkin pie. Hold all other dishes please, I don't need them. I can sufficiently stuff myself silly on these 3 items.

Last year (yes, last year - I obviously made this for Thanksgiving, so it was too tardy to post for last year's Thanksgiving), we were without family for the big meal, but invited some friends over. I made all the usual suspects: mashed potatoes, candied yams, green beans, a vegetable pot pie, and pumpkin pie. Typically, I would have made the same pie my mom makes... Libbys. Straight from the can, no muss, no fuss, always good. But for some reason, I had it in my head that the recipe called for sweetened condensed milk. Wrong. It calls for evaporated milk. Being a thrifty girl, I couldn't throw out the sweetened condensed milk and knew there must be a pumpkin pie recipe that uses it. Google to the rescue!

Yes, I like plenty of whipped cream! The more the better.

After reading the reviews, this was easily the winning recipe. I liked that it had a bit of spice to it, also carried through in the whipped cream. We were not disappointed! It's crazy delicious. Our guests asked us what was in the pie and whipped cream, all wide-eyed and excited after the first bite. They cleaned their plates and wanted the recipe. Yep, a keeper! This is our new family pumpkin pie recipe, I just can't go back. Sorry Libby.

Happy Thanksgiving and pie eating to you and yours!


Pumpkin Pie with Spiced Whipped Cream

from Epicurious/Bon Appetit (Nov. 2003)

1 9-inch deep-dish pie crust, pierced all over with fork (frozen is also ok)
1 15-ounce can pure pumpkin
1 14-ounce can sweetened condensed milk
1/4 cup sour cream
2 teaspoons ground cinnamon, divided
3/4 teaspoon ground ginger, divided
1/2 teaspoon vanilla extract
1/4 teaspoon ground allspice
2 large eggs
3/4 cup chilled whipping cream
2 tablespoons sugar


Preheat oven to 400°F.

Bake crust until browned, pressing bottom and sides of crust occasionally with back of fork, about 14 minutes. Cool crust on rack.

Reduce oven temperature to 350°F.

Whisk pumpkin, condensed milk, sour cream, 1 1/2 teaspoons cinnamon, 1/2 teaspoon ground ginger, vanilla, and allspice in large bowl to blend. Whisk in eggs. Pour into crust (some filling may be left over).

Bake pie until filling is puffed around sides and set in center, about 55 minutes. (Do not fear, the puffiness settles down!)

Cool pie on rack. (Can be made ahead. Let stand at room temperature 2 hours, or cover and chill overnight.)

Beat whipping cream, sugar, 1/2 teaspoon cinnamon, and 1/4 teaspoon ginger in bowl until peaks form. Spoon large dollops around edge of pie and serve.

Guten appetit!

Tuesday, October 27, 2009

Uncle Mark's Chocolate Cake

Let's hear it for Uncle Mark! Another of his family-favorite recipes turned out fabulous. I practically ate this entire chocolate cake myself.

It was dense, so a couple of people I served it to asked whether it was flourless. The answer is 'no'. It has a wee bit of flour in it. I can't help it, I find flourless bakery items odd. Or at the very least, a mystery. I can't recall ever having tried one, so it's all a preconceived notion in my head. HOW does one make a cake flourless? I bet it's actually easy, and just one of those things you need to do once to understand. However, I'm sticking with this cake and it's flour. It's my new go-to chocolate adult party cake.

Why 'adult party cake'? As you can see above, it has no frosting. Kids like frosting. Don't deny them frosting.

However, the cake is rich, moist, dense and delicious. It does not need frosting. When serving to adults.

I dusted it with powdered sugar for better presentation, but it doesn't need that either. Just pure chocolate-y goodness.

Marie-Claude Gracia's Chocolate Cake
from Food & Wine, via Uncle Mark

1 stick (4 ounces) plus 3 tablespoons unsalted butter, at room temperature
12 ounces bittersweet chocolate, preferably Lindt or Tobler, broken into pieces (I used Ghirardelli)
3/4 cup granulated sugar
5 eggs, separated
1/3 cup unbleached all-purpose flour
Confectioners' sugar, for garnish (optional)

Preheat oven to 350 degrees. Using 1 tablespoon of the butter, generously grease a 9-inch springform pan.

In a double broiler*, combine the chocolate, remaining 10 tablespoons of butter, and the sugar. Cook over barely simmering water, stirring occasionally, until melted and smooth, and about 8 minutes. Remove from the heat.

* Don't have a double broiler? Do what I do, and substitute a metal bowl over a pot of boiling water. Voila. Your own home-made double broiler.

Let the chocolate mixture cool for 10 minutes; then whisk in the egg yolks. Stir in the flour just until blended.

In a large bowl, beat the egg whites just until they form firm peaks; do not overbeat. Stir on-third of the egg whites into the chocolate batter until blended. Fold in the remaining egg whites until the mixture is well blended and no streaks of white remain. Spoon the batter into the springform pan.

Bake the cake in theh middle of the oven for 35-40 minutes, until firm and springy and a tester inserted near the center comes out clean.

Let teh cake cool on a rack for 2 hours (I did not do this. Mine cooled for about 30 minutes), then remove the sides of the springform. Let the cake cool completely, about 1 hour longer. Invert the cake onto a platter and carefuly remove the springform bottom. This cake is traditionally serve without icing. To garnish, dust the top with a sprinkling of confectioners' sugar.

Serves 8-10.

Guten appetit!

Friday, October 2, 2009

Frozen Mocha Cheesecake

I'm tired. New moms are tired. And because I'm tired, I'm ditsy. Kristen at Dine and Dish had a great, very funny, post about a mom of 4 being called ditsy. I can't even imagine how someone holds everything together with 4 kids. More power to you!

But, back to my ditsy-ness. I made this 'cheesecake', which is a frozen pie, and somehow missed the part about it needing to freeze. I left it in the refrigerator overnight and was insanely perplexed as to why it was STILL incredibly runny the next day. Cursing the directions for not telling me to freeze the pie, I served it anyway. What a drippy mess. Only then, did I realized it was probably supposed to be frozen. So, I stuck it in the freezer, a couple slices missing, and sure enough, it hardened up nicely.

Luckily, even as runny goop, it tasted great. If you like coffee and chocolate, you're going to really, really like this pie. Just don't forget to freeze it.


Frozen Mocha Cheesecake
from Taste of Home

Crust:
1-1/2 cups chocolate wafer crumbs
2 tablespoons sugar
1/3 cup butter, melted

Filling:
2 packages (8 ounces each) cream cheese, softened
1 can (14 ounces) low-fat sweetened condensed milk
2/3 cup chocolate syrup
1 tablespoon instant coffee granules
1 teaspoon hot water
1 cup whipped cream


Combine crust ingredients. Press into the bottom of a 9-in. springform pan; set aside.

For filling, beat cream cheese in a large mixing bowl until smooth. Gradually add milk and syrup.

Dissolve coffee in water; add to mixing bowl. Fold in whipped cream.

Pour into crust and freeze at least 6 hours.

Guten appetit!

Friday, September 18, 2009

Creamy Fruit Dip

My friend Sonya finds some great recipes. She's the type of person where, when eating dinner at her house, I'm usually in awe. Never walking away without at least one of the recipes from the evening.

Sonya is generous with her recipes, and friendship. She hosted my baby shower months ago, and had the most beautiful food spread... I was in awe. Again.

The shower was a brunch, and one of the dishes she served was fresh fruit, accompanied by a creamy sweet dip. Sonya was very aware of my pregnancy sweet tooth. Since you can't serve ONLY sweet, sugary foods, you almost always want to (or feel obligated to, because personally, I could have only had sweets! ha) have some fruit to round out the meal. A token strawberry on my plate does make me feel healthier. I can't lie.

Since the shower, I've served this dip at almost all of my breakfast/brunch gatherings. This dip is so ridiculously easy (the hardest part is cutting up the fruit), and so good, I expect it will become a part of your morning party repertoire too. No more store bought overly pricey pre-made fruit dip for you! Enjoy.


Creamy Fruit Dip
from Sonya

1 1/2 cups Sour Cream
2 tablespoons Brown Sugar

+ Fruit for dipping (I like strawberries, apple and cantaloupe as constants. Then I usually add another fruit that the store is carrying and looks fresh/good, such as: kiwi, blueberries, pineapple, raspberries or blackberries)

In a small bowl, whisk the sour cream and sugar until completely blended (1-2 minutes). Refrigerate up to 1 day in advance.

Cut and plate your fruit. Place fruit dip in a small serving bowl next to your fresh fruit.

Done.

Guten appetit!

Friday, September 11, 2009

Bear's Peach Cobbler

Does life ever slow down? No?

No. I didn't think so.

I know this is a common theme of mine, falling behind, being in a hectic state, but I have to apologize to the Sweet Melissa Sunday folks. I joined this group, on an unrealistic whim, as I've always wanted to join a cookbook blogging group. Plus, I had that insatiable sweet tooth during my pregnancy and nursing months (the sweet tooth is still around, but I'm slowly getting it under control!). Pies, cookies, jams... yes, please!

After I received my book via the lovely amazon.com, I was able to join the fray and made two weeks worth of recipes. But, I didn't ever seem to find the time to post them. A new recipe is chosen once a week to make on Sunday's, so as the third week of my membership rolled around, a new recipe came out and I bought all the ingredients... only I never made the dish. This is when I really started to fall behind (let's face it, I was always behind). At this point, the days kept clicking by. Then, I wasn't even checking the site anymore.

After about a month of being MIA, I just looked and found that I was quietly dropped from the group. I agree. I should have been. I'm sorry fellow bakers, I bit off more than I could chew during our move. While I had the best of intentions, I take my sweet tooth and leave you to bake without me!

Although, they have Orange Scented Scones coming up next week, and Carmelized Onions, Sage and Cheddar Muffins the next. Maybe I'll keep baking with them, informally. Only when I have the desire and time. Without the guilt of missing a week, or five.

Here was my first recipe, made in June!, from the Sweet Melissa Baking book. It was a hit at a friend's BBQ we went to. Canned, frozen or fresh peaches all seemed to work well for the Sweet Melissa bakers. Also, it was noted to lessen the sugar. I used 1/4 cup and found it to be perfect.


Was one of the easier cobblers I've made, and the bottom side of the biscuits cooked through (I hate when the cobbler topping has a gooey underside, yuck!).

Be sure to cut out fun shapes to top your cobbler. It's all about presentation!

Bear's Peach Cobbler
From the Sweet Melissa Baking book

Ingredients for the cobbler topping:
1 cup all-purpose flour
1 teaspoon baking powder
1/4 teaspoon kosher salt
2 tablespoons sugar, plus 1 1/2 teaspoons for sprinkling
1/2 teaspoon freshly grated lemon zest
2 tablespoons cold unsalted butter, cut into 1/4-inch pieces
1/2 cup heavy cream
1 tablespoon whole milk or heavy cream, for glazing

Ingredients for the peach filling:
6 cups peeled, sliced, ripe peaches (bout 3 1/2 pounds)
Juice of 1 lemon
3/4 cup sugar (I used 1/4 cup)
2 tablespoons cornstarch
1/2 teaspoon ground cinnamon

Directions:

In a large bowl, whisk together flour, baking powder, salt, 2 tablespoons sugar, and zest. Using a pastry blender, cut in the butter until it resembles a coarse meal. Little by little stir in the heavy cream until dough starts to hold together (a bit more cream may be used if needed).

Turn the dough out onto a lightly floured work surface. Pat dough together to form a round about 1/2-inch thick. Using a lightly floured 2 1/2-inch round biscuit cutter (I used a star cookie cutter) to cut the dough into 7 to 8 biscuits.

Place biscuits on a cookie sheet lined with parchment or aluminum foil and refrigerate loosely covered with plastic wrap, while you make the filling or until you are ready to use.

Preheat oven to 350 degrees F. and butter a 2-quart ovenproof deep-dish pan. Line a cookie sheet with parchment or foil.

To make the filling, stir together peach slices, lemon juice, sugar, cornstarch and cinnamon in a large bowl.

Pour peach mixture into prepared dish.

Place the biscuits evenly on top of the peach mixture and brush with milk. Sprinkle with remaining sugar.

Place dish on the lined cookie sheet (so nothing bubbles over and messes up your oven!) and bake for 1 hour and 15 minutes or until biscuits are cooked through (to test this, I lightly pulled up on one of my star biscuits to make sure they were fully cooked).

Remove to a wire rack to cool before serving. This cobbler should be eaten the day it is baked. Serve warm with vanilla ice cream or whipped cream.

Serves 6 to 8.

Guten appetit!

Tuesday, May 19, 2009

Perfect Pie Crust (Savory or Sweet)

This crust truly lives up to it's name. Easy to make, and portions great into freezer friendly crusts for future. If you're going to make a pie crust, why not have some left over to make a future pie faster and easier to whip up? Make life easy on yourself.

I suppose, if it's a perfect crust, it also needs to taste great, right? It does. I've used it on both sweet (apple and pumpkin) pies, as well as savory pies (pot pie and quiche). They all tasted delicious!

The only trick I found, is giving yourself enough time to dethaw the crust, if you are using a frozen portion. Fresh is obviously no problem.

If using a frozen portion: Simply unwrap all but one of the saran wrap layers and lay it out on your counter to dethaw for approximately 20 minutes. If it's too hard, it will crack and be difficult to work with. It doesn't have to be completely thaw though, as it will still be malleable and small cracks can be pinched back together.

I got 3 crusts from the recipe, but should have been able to make 4. The crusts were a little thick. Tammy says you can get 6 (3 pies, with tops), but I don't see that. You'd have to roll really thin.

It's great if you are hosting a party where you need multiple crusts for your dishes. For example, you're hosting wedding shower and wanting to serve a couple quiches and a strawberry pie for dessert. Or you are making a quiche for Christmas morning, and an apple pie for Christmas dessert. Or, you're making a quiche, and want to make life easy on yourself down the road, next time you're making a pie or quiche. You wont regret using this crust.


Perfect Pie Crust

from Tammy's Recipes

2 1/4 cups all-purpose flour
1 3/4 cups whole wheat flour
1 3/4 cup butter or shortening
1 tablespoon sugar
2 teaspoons salt
1 tablespoon vinegar
1 egg
1/2 cup cold water


In a mixing bowl, mix flour, salt and sugar. Cut in butter until pea-sized lumps remain. In a separate bowl, beat vinegar, egg, and water. Add to flour/butter mixture and stir/mix just enough to make a dough. Mixture will be sticky still. Cover with plastic wrap and refrigerate for at least 15 minutes. (I usually refrigerate for an hour or more). Roll into shape (on floured surface) and use with fruit, pumpkin, or any pie requiring an unbaked crust. For pies requiring a pre-baked crust, bake at 425 degrees until slightly browned.

This recipe will make three medium-thickness 9-inch pie crusts (including tops). If you like a thicker crust, it will do 2 pies with tops. If you roll really thin, you can get 4!

Dough can be refrigerated up to three days or frozen until ready to use.

Delicious sweet pies you can make with this crust:
- Vegetable Pot Pie
- Blueberry Pie, from Andrea's Recipes
- Cindy Crawford's Strawberry Pie, from Not Quite Nigella
- Blackberry Pie, from Alpineberry

Guten appetit!

Tuesday, March 31, 2009

Texas (Chocolate) Sheet Cake

This post is going to be short and sweet. Sweet being the important part of the post!

This recipe is another one of my mom's staples, and one I have very fond memories of. Texas Sheet Cake was made regularly for birthdays, work potlucks (you better believe a piece or two was gone before it ever made it to work), summer picnics, and informal dinner parties. Reasons being, it makes a lot and travels well. Oh, and lets not forget, it's a serious crowd pleaser!

You only need a 3x3 slice (or less, but why skimp with something this good?!) and a scoop of vanilla ice cream to satisfy each eager belly.


I hope you enjoy this one as much as my family and I have, for years.

Texas Sheet Cake
from my mom

1 1/2 cup (3 sticks) margarine or butter, divided
1 cup water
8 tablespoons cocoa, divided
2 cups flour
2 cups sugar
1 teaspoon baking soda
1/2 teaspoon salt
1/2 cup sour cream
2 eggs, lightly beaten
6 tablespoons milk
1 pound powdered sugar
1 teaspoon vanilla
1 cup chopped nuts


Cake:

In a pan, heat to boiling 1 cup (2 sticks) margarine, water, and 4 heaping tablespoons cocoa. Remove from heat and pour into a large mixing bowl.

Add flour, sugar, baking soda, and salt. Blend well.

Add sour cream & eggs. Mix thoroughly.

Bake in jellyroll pan at 375 for 15-17 minutes.

Frosting:

In a pan, heat to boiling 1/2 cup (1 stick) margarine, 4 tablespoons cocoa, and milk. Remove from heat.

Add powdered sugar, vanilla, and chopped nuts. Spread while cake is hot (it can sit as long as 10-15 min before frosting).


I love this cake plain, or served with vanilla ice cream.

More delicious sheet cakes:
- Black and White Marble Sheet Cake with Chocolate Fudge Frosting, from Baking Bites
- Gooey Apple Sheet Cake, from Tales from a Veggie Kitchen
- Cherry Sheet Cake, from Martha Stewart
- Frosted Chocolate Chip Zucchini Sheet Cake, from Culinary in the Country

Guten appetit!

Tuesday, February 10, 2009

Oatmeal Spice Cake

Valentines day is coming up. I fall into the camp of appreciating the holiday and what it stands for, but understand it's a Hallmark holiday. Valentines is something that should be celebrated everyday. I don't care if we go out to dinner specifically on V-day, the prices are all jacked up and it's usually overly crowded. I prefer to receive flowers on another random day, when the prices are back to normal, and to go to dinner at our favorite restaurant when we feel like a special night out and aren't forced to have a set course meal. Hmm, maybe I sound a little bit bah-hum-bug. I'm not, I really do love the idea of celebrating your Valentine. It's just that I'd usually choose to stay in on Valentines and make a fun dinner for just the two of us, and then maybe go out to dinner the following weekend.

Plus, I like to do fun things for Tim to tell him he's my valentine more than once a year. I write notes and put them in his lunch. I surprise him with a special dessert on random days. And I still ask him on dates, such as to go on a walk, to go out to dinner, see a movie, etc.

So while I'm happy that Valentines day is coming up, I hope it's not the only day he feels utterly and completely loved.

If you happen to be spending a lovely night and dinner at home with your family or loved one, this may be a perfect treat to surprise them with! Valentines day, or any other day. I know chocolate is traditional, but there's something about the combination of coconut, nuts and sugar that draws me in.

Super easy to make, and the cake was light and fluffy. The coconut topping gave it most of the sweetness, but wasn't too sweet. Kept well for leftovers the next day too. I served it with a scoop of vanilla ice cream (A bit of overindulgence? Yep, guilty).

Yikes, this is a dark photo! Sorry

Oatmeal Spice Cake
from Tammy's Recipes

Spice Cake Ingredients:
1 1/2 cups flour
1 cup quick oats
1 cup brown sugar
1/2 cup granulated sugar
1 1/2 teaspoons baking soda
1 1/2 teaspoons cinnamon
1/2 teaspoon salt
1/2 teaspoon nutmeg
1/2 cup butter, softened or melted
1 cup water
2 eggs
2 tablespoons molasses

Coconut Topping Ingredients:
1/4 cup butter
2/3 cup brown sugar
1/2 cup shredded coconut
1/2 cup chopped pecans
3 tablespoons light cream or whole milk


Measure all cake ingredients into a large mixing bowl. Blend 1/2 minute on low speed, and then for 3 minutes on high.

Pour batter into a greased 9 x 13 baking pan. Bake at 350 degrees for 35-40 minutes or until cake tests done. Cool cake slightly.

To make coconut topping, melt butter in sauce pan. Add brown sugar and stir over medium heat until sugar is mostly dissolved. Add coconut, pecans, and cream. Spread topping over cake and broil cake for 2-3 minutes, until topping is bubbly and browned.

More cakes to try:
- Our favorite Carrot Cake
- Lavender Chiffon Cake with Cream Cheese Frosting, from Fresh from the Oven
- German Chocolate Cake, from David Lebovitz
- Mocha Rum Cake, from Joy the Baker

Guten appetit!

Friday, January 23, 2009

Oatmeal, Chocolate Chip and Pecan Cookies

Smitten Kitchen, Smitten Kitchen... how I worship and love thee! When I saw these cookies posted by Deb in November, I was sold. Hook, line and sinker. I think I may have drooled while looking at the screen (don't tell anyone, and sadly, this happens all too often). I've been thinking about them for 2+ months though because I hadn't the opportunity to make them. Well, no more! After all, January is Oatmeal Month. If that isn't a special, good enough reason to make these, I don't know what is.

Slide over Mrs. Fields, there's a new lip smacking cookie in town: the Oatmeal, Chocolate Chip, Pecan Cookie. Oh my.

Soft, with a little crunch. A winning combination of oats and chocolate. Then, add the nutty flavor and some spices... mmmm. Truly a great cookie. I ate 3 immediately out of the oven (darn this pregnancy sweet tooth!).


They're chocolate chip cookies kicked up a 1,000 watt notch. Make. These. Soon.

Just for fun, consider making these into ice cream sandwiches this summer! Easy kid-friendly project, and oh so tasty. I know what you're thinking though, "How can I possibly be thinking of summer and ice cream sandwiches when it's so cold outside?!". The answer is, I think about ice cream all the time.

Oatmeal, Chocolate Chip and Pecan Cookies
thank you Smitten Kitchen!

8 tablespoons unsalted butter, at room temperature
3/4 cup sugar
1 cup light brown sugar, firmly packed
1 teaspoon salt
1 teaspoon vanilla extract
2 large eggs
1 1/2 cups flour
1 teaspoon baking soda
1/2 teaspoon ground cinnamon
1/4 teaspoon ground nutmeg
1/8 teaspoon ground clove
1 cup quick-cooking oats
2 cups chopped pecans
2 teaspoons freshly grated orange zest (optional) - I did not use
12 ounces semisweet chocolate chips


Preheat oven to 350 F. Line a large cookie sheet with parchment or a Silpat (rubber nonstick baking mat).

Using an electric mixer, beat the butter in a bowl until light and fluffy. Add both sugars, salt, and vanilla, and beat until well mixed, about 3 minutes. Stir in eggs, one at a time.

Sift together the flour, baking soda, cinnamon, nutmeg, and clove in a separate bowl. Add half of the flour mixture to the butter with the mixer on low speed. Once the flour has been incorporated, add the second half.

Stir in the oats, pecans, orange zest, and chocolate chips.

Drop the dough, by the tablespoon, onto the cookie sheet and bake for 10-12 minutes or until golden. Remove from the oven and cool the cookies on a rack. Store at room temperature in a cookie jar or other airtight container.

Makes about 3 dozen cookies.

More on the oatmeal cookie blogger front:
- Peanut Butter Oatmeal Cookies, from La Cuisine d'Helene
- Oatmeal and Dark Chocolate Cookies, from La Tartine Groumande
- Agave and Oatmeal Honey M&M Cookies, from The Recipe Girl
- Cranberry, Pistachio and White Chocolate Chip Cookies, from Closet Cooking

Guten appetit!

Tuesday, January 20, 2009

Chocolate-Bottom Banana Squares

Have you finally come down from the holiday sugar-rush? Are you ready for more? More! More! More!

This is a good one for the person craving something sweet, but who doesn't like it TOO sweet. The delicious taste of banana bread, combined with chocolate. How could something so good, be wrong? It can't, so go ahead, give in. You've earned it for surviving the holidays, the winter weather and whatever else is going on in your life. Treat yourself.


Chocolate-Bottom Banana Squares
from Tammy's Recipes

1/2 cup butter
1 cup sugar
1 egg
1 teaspoon vanilla
1 1/2 cups mashed banana (about 3 medium bananas)
1 1/2 cups flour
1 teaspoon baking powder
1 teaspoon baking soda
1/2 teaspoon salt
1/4 cup baking cocoa
1 cup chocolate chips (I only used 1/2 cup, but will use more next time as they sink in during baking)


In mixing bowl, cream butter and sugar. Add egg, vanilla, and bananas, beating thoroughly.

In a separate bowl, combine flour, soda, baking powder, and salt. Add to creamed mixture and mix well.

Divide batter in half. Add the cocoa to one portion of the batter. Spread that portion in the bottom of a greased 9 x 13-inch baking dish. Spoon remaining batter on top, swirling gently with butter knife if desired, and sprinkle with chocolate chips.

Bake at 350 degrees for 30 minutes or until batter tests done with a toothpick or fork. Cool and cut into 24 squares.

Guten appetit!

Tuesday, December 23, 2008

Cherry Topping (or pie filling)

For dessert, I would always choose a fruit option (pie, cobbler, etc) over cake (chocolate, cheesecake, etc). So, if I am going to have cheesecake (twist my arm. go ahead, twist it. oh, ok, I'll have a slice!), it most definitely will have a fruit topping. And if I'm baking said cheesecake, I'm going to whip up my own fruit topping, avoiding the overly gooey store bought kind.

Since Tammy had such a winning recipe for cheesecake, I wanted to try her cherry topping. Mine looked significantly different than hers (comparing pictures). Hers had more of the store bought look, with a thicker consistency and dark red color. Mine stayed light pink in color and fairly runny. I was using corn starch to thicken the sauce, and was worried about adding too much (see recipe notes below). Using jel would be easier, but cornstarch is more common to have in the house and was my preference to use.

No matter the color or consistency, the taste was delicious! Those who took a small amount of sauce to start, asked for more. And there's no mistaking, homemade is waaayyyyyy better than store bought.


Cherry Topping/Pie Filling
from Tammy's Recipes

3 cups pitted sour cherries
1 1/2 cups sugar
clear jel or cornstarch, for thickening (I used 2 teaspoons cornstarch, but will increase it to 3 next time)


Makes 3 cups.

Combine fruit and sugar in a pan and stir together. Bring to a boil.

Mix cornstarch or clear jel* with some cold water or reserved cherry juice (about 1/3 cup of each), whisking to remove lumps.

*Cornstarch thickens, and will continue to become thicker as your mixture cools. Do not make it as thick when hot as you would like it to be when it has cooled, or it will be too thick. Clear jel, however, is the same thickness hot as it is cold. We prefer clear jel for thickening pie filling, as it is easier to see the consistency, and the pies don't tend to run over in the oven as easily.

When cherries are boiling, add thickening while stirring constantly to prevent lumps. Add enough thickening to make the consistency you desire. We like our pies fairly thick, but cheesecake topping thinner.

If you're making a pie: Pour into pie crusts (unbaked pastry). Bake pies at 425 degrees F for about 30 minutes or until browned.

Other fruit topping recipes for cheesecake:
- Blackberry Sauce, from Joy the Baker
- Blueberry Sauce, from Annie's Eats
- Mixed Berry Sauce, from Something Sweet
- Plum and Strawberry Sauce, from Wannabetvchef.blog

Guten appetit!

Friday, December 19, 2008

Classic Cheesecake

I hope everyone is enjoying their holiday, and celebrating with friends & family all around you. Words can never describe the magic of this season! I love it.

As a holiday recipe, I'd like to share with you a very delightful treat: Cheesecake.


You all know, my last attempt at cheesecake turned out OK, but not great. I decided to go back to the basics and make a really great classic cheesecake. My sister, in particular, loves cheesecake. So I also thought I should have a solid recipe in my arsenal for her birthdays, special occasions, etc.

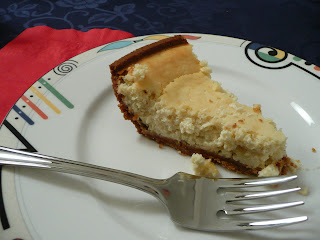
This recipe is definitely my new go-to cheesecake! Was very easy, tasted creamy and rich, was dense, and cooked without any hassle (no water baths, etc). If a cheesecake recipe turns out this perfect on your first try, it's got to be good.

My only complaint would be that it made a very thin pie. I would rather have a thicker cheesecake, and will use a deep dish pie plate next time. Problem easily solved!

If not a cheesecake, what dessert will you make/have you made for your December holiday gatherings? Please share.

Happy, happy to all of you!

Classic Cheesecake
from Tammy's Recipes

12 ounces cream cheese, softened
4 ounces sour cream
3/4 cup sugar
2 eggs
1 teaspoon vanilla
one 9-inch graham cracker crust*


In a large bowl, beat cream cheese, sour cream, sugar, eggs, and vanilla until smooth. (seriously, that's all there is to it!)

Pour into crust and bake for 45 minutes at 350 degrees. Remove from the oven and let cool.

Chill for at least 4 hours or up to two days before serving. Top with fruit topping (easy and delicious cherry topping recipe coming up on Tuesday), whipped cream, or just eat plain!

* You can make your own crust by combining 1 cup graham cracker crumbs, 2 tablespoons sugar, and 4 tablespoons melted butter. Press into the bottom of your dish and fill as directed.

Mmm, mmm, cheesecake:
- Blueberry Cheesecake, from The Blog Chef
- Vegan Eggnog Cheesecake, from Fatfree Vegan Kitchen
- No Bake Cheesecake, from Closet Cooking
- Chocolate Pecan Cheesecake Bars, from Bake or Break

Guten appetit!

Tuesday, December 9, 2008

Rocky Road Granola Clusters - Fun homemade gift

Today is going to be a short post. We have wonderful guests visiting us, and I was able to finish these neighbor holiday gifts just before their arrival. But now that they're here, we want to go out, not be inside on the computer.

This is a tribute to the season, for anyone looking for something wonderful and easy to make homemade, as a low-cost, delicious, made with love gift for family, friends or neighbors during Advent. How delicious are they? Tim liked these so much, he told me I was never allowed to make them again, they're too dangerous to have in the house. I actually thought they were a bit too sweet, but I err on the lower end of the sweet spectrum. For the holidays, I think most people like to indulge.

This would also be a fun project to do with little bakers in the house. All that's required is mixing and spooning the mix onto baking sheets to harden.

My gift to the neighbors...

Rocky Road Granola Clusters
from Safeway

1 (16-oz.) package chocolate candy coating, chopped (I used chocolate chips, and they worked fine. But they do not melt easily in the microwave, and if not watched and strirred, can burn)
2 tablespoons shortening
1/4 cup creamy peanut butter
2 to 3 cups coarsely chopped granola bars
3/4 cup sesame sticks or thin pretzels
3 tablespoons slivered almonds, toasted (I forgot to add these, and was still great!)
1 cup miniature marshmallows
12 caramels, chopped


Combine chocolate coating and shortening in a large microwave-safe bowl; cover loosely with heavy-duty plastic wrap. Microwave at HIGH 11/2 minutes or until melted, stirring once. Stir in peanut butter. Let stand 2 minutes. Stir in granola bars, sesame sticks, and almonds. Stir in marshmallows and caramels last so they don't melt. Drop by rounded tablespoonfuls onto parchment or wax paper. Let clusters stand until firm.

Easy peasy.

Guten appetit!

Friday, November 28, 2008

Banana Bread

The smell of banana bread reminds me of waking up as a kid to delicious morning smells. I love the way it fills your house. My mom, aka 'Super Mom', made us breakfast every morning (and yes, she had a full-time job too). Waffles, oatmeal, pancakes, blueberry muffins... and banana bread (not all in the same day though!).


This isn't actually my mom's recipe, as I simply haven't asked her for it yet. But it tastes just like it, so my guess is that it will be pretty close. This one came from a friend, and it's HER mother's recipe. Go moms!

Mmm, delicious.

TIPS:
- As you gear up for the holidays, make a double batch and freeze a couple loaves to bring with you to brunches, family gatherings or as a hostess gift. You can freeze the loaves up to 6 months.
- To freeze banana bread, wrap tightly in saran wrap and then tinfoil or a ziploc sack. To eat a frozen loaf, you can thaw/warm it in the microwave or oven.
- Bought too many bananas? You can also freeze the banana's up to 3 months! They will turn dark or black in the freezer. When you are ready to make a batch of banana bread: remove bananas from the freezer and let thaw for 5-10 minutes, then peel them with a knife. You don't want them to go too soft, or they are very hard to peel. I also find that I need an extra banana to fill the cup portions required when using frozen.

Banana Bread

3/4 cup unsalted butter
2 cups sugar
3 cups flour
4 eggs
1/2 cups heavy cream
2 cups banana, sliced into small pieces
2 teaspoons vanilla
2 teaspoons baking soda
1/2 teaspoon salt
1/2 cup chopped walnuts (or pecans), toasted or raw *optional


Preheat oven to 350. Grease one 9x13 inch pan, or two 7x3 inch loaf pans.

In a medium bowl, mix the flower and salt together. Set aside.

In a large bowl, beat the butter on medium speed until creamy (approximately 5 minutes). Then add the sugar and mix, eggs (one at a time) and mix, and finally the vanilla. Beat until everything is mixed well (an extra 1-2 minutes).

Then add the heavy cream and baking soda, and mix well. Next add the banana slices and mix until the banana has been mashed and fully integrated.

Add the flour/salt mixture slowly (1/2 cup at a time), while beating on medium speed. Be sure each addition is mixed in well before adding more flour. Mix a little longer past the last flour addition, and done.

Pour batter into prepared pan and bake 45-50 minutes. The bread is done when a toothpick inserted in the center comes out clean.

Twists on tradition:
- Mocha Banana Bread, from Cooking with Amy
- Chocolate Chip and Sour Cream Banana Bread, from Closet Cooking
- Cherry Coconut Banana Bread, from Treat a Week Recipes

Guten appetit!